Home » Inspeksjonsutstyr » RVI » Digitale fleksible boroskop » Real3D Measurement
Real3D Measurement
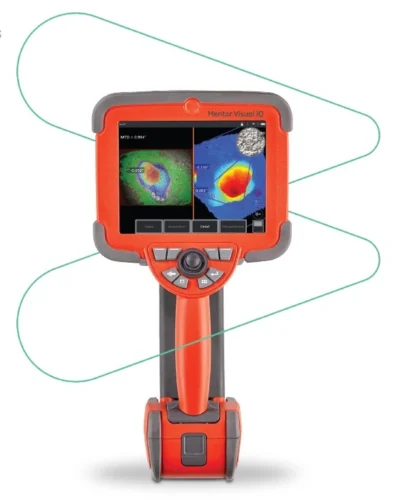
Fremskritt innen billedbasert 3D måling gjør videproben til et stadig kraftigere verktøy i inspektørens verktøykasse. Mens man tidligere kunne identifisere indikasjoner og ta bilder; dagens avanserte videoprober lar en kartlegge, måle og analysere funn i 3D.
De nyeste Real3D måleteknologiene tillater sanntidsbruk av en 3D XYZ punktsky med full overflate for å sjekke datakvalitet, og hjelpe inspektøren med å plassere markører fra flere vinkler og perspektiver.
Med InspectionWorks kan man dele live inspeksjoner, bilder og data trådløst til en telefon eller nettbrett lokalt eller til eksterne eksperter.
Med forbedret presisjon og nøyaktighet tillater denne nye funksjonaliteten video inspeksjon for å komplementere eller i noen tilfeller erstatte andre NDT modaliteter.
Tekniske spesifikasjoner
| 3D Phase Measurement | Using patented structured-light technology, 3D Phase Measurement enables inspectors to locate, measure, and analyze an indication using the same tip optic. The wide field of view and large depth of field allow for measuring with the same tips used for inspecting, thus eliminating the extra steps required to back out, change the tip, and then relocate the indication. In effect, 3D Phase Measurement provides accurate measurement “on-demand” while saving time and increasing overall inspection productivity. 3D Phase Measurement employs structured light patterns projected from the tip to create a 3D surface scan of the viewing area and can measure all aspects of surface indications. Benefits:
|
| 3D Stereo Measurement | 3D Stereo Measurement utilizes the same optical tips as traditional Stereo Measurement, but employs more advanced calibration and processing algorithms to generate a full 3D point cloud representation of the target surface that can be viewed, manipulated, and analyzed. Benefits:
|
| Stereo Measurement | Traditional stereo measurement, which, like 3D Stereo, utilizes a patented prism to obtain left and right stereo images from slightly different perspectives. The matching of surface points in the left and right images at the cursor locations allows 3D coordinates and measurement results to be computed. This technology, available for more than a decade, is useful on systems with limited computing power, but does not provide a 3D point cloud and therefore limits the inspector’s ability to assess measurement quality. |
| Comparison Measurement | A more traditional 2D measurement technology that uses a physical reference target placed by the manufacturer or inspector at the same tip to target distance as the indication. |
| PC Re-Measurement | Using software such as Inspection Manager to conduct post-inspection image measurement and analysis on a stored image. Today, re-measurement capabilities are also available on-device using the Mentor Visual iQ system or on PC. |

